Category: ARC Raiders

ARC Raiders:The Best Way to Finish Week 18 Trials

With the return of Weekly Trials in ARC Raiders, players can dive back into the action to earn stars and unlock valuable seasonal rewards after a brief break for the Expedition Window.

This comprehensive guide will outline each Week 18 Trial objective, the optimal maps to traverse, and effective strategies to quickly achieve three-star completions.

Each challenge can be tackled independently, so planning your route and selecting the right maps will enhance your efficiency.

Damage Leapers (Week 18 Trial)

Leapers are fierce foes in ARC Raiders, particularly in open environments. However, with the right positioning and weapon choices, you can handle them effectively.

Best Map:Launch Towers (Spaceport)

This location frequently spawns ARC activity and offers adequate cover.

Strategy Tips:

Use heavy weapons for reliable mid-range damage.

Stay partially covered before attacking.

Target the center core for maximum damage.

Avoid wide-open spaces unless threats are cleared.

To earn three stars, eliminate two Leapers during a major map event. Opt for high-intensity conditions to complete this quickly.

Loot Bird’s Nests (Bird City Condition)

For this trial, you need the Buried City map during the Bird City condition. If it’s not active, you’ll have to switch matches until it appears.

Looting Locations:

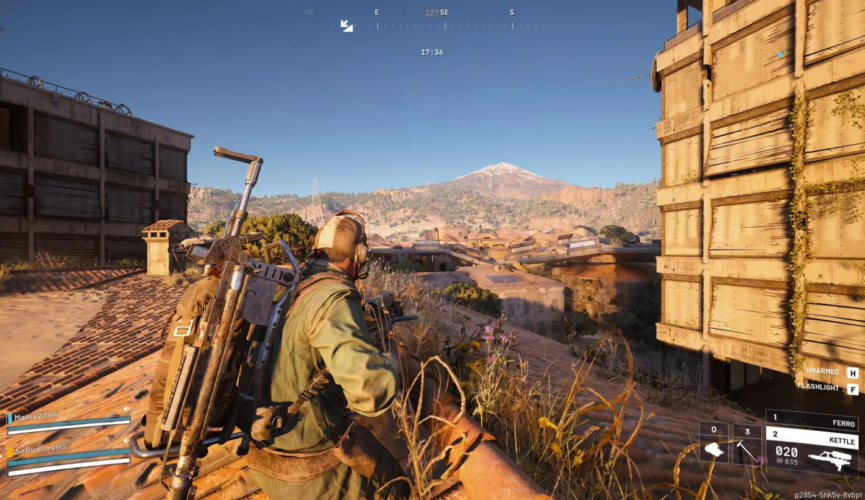
Head to rooftops.

Search within chimneys.

These nests contribute to your objective progress and often contain valuable collectibles for sale at Speranza.

Pro Tips:

Use mobility gear for swift rooftop navigation.

Eliminate nearby enemies before climbing.

Combine this objective with probe hunting if conditions align.

Damage Spotters (Week 18 Trial)

Spotters act as aerial support drones, marking players for Bombardiers, who can then become a significant threat.

Finding Spotters:

You can complete this trial on any map except Stella Montis. Spotters typically:

Fly in pairs.

Hover and scan the area.

Respawn after being destroyed.

Fast Completion Strategy:

Use a sniper or accurate mid-range weapon.

Stay in partial cover while aiming upward.

Prioritize Spotters before engaging Bombardiers.

Efficiently clearing the skies will help you quickly secure three stars.

Open ARC Probes (Week 18 Trial)

This challenge is one of the easiest of Week 18.

Probes Locations:

ARC Probes can appear on any map, with the best way to find them being:

Participating in the Prospecting Probes event.

Listening for the distinctive pinging sound.

Breaching Tips:

Clear nearby enemies before interacting.

Stay aware of your surroundings—as probes often attract combat.

Focus on quick breaches and collection to earn three stars swiftly.

Combining probe hunting with damage runs on Spotters can enhance efficiency.

Search Containers in the Medical Research Wing (Stella Montis)

This trial is specific to the Stella Montis map.

Search Locations:

Go to the western side of Stella Montis.

Locate and loot containers in the Medical Research Wing.

To secure three stars, you must:

1.Loot a sufficient number of containers.

2.Successfully extract.

Make your extraction quick once your loot goal is met. Ensure your gear is optimized before entering Stella Montis to improve your survival chances during these contested extractions.

Optimal Strategy for Week 18 Trials

To maximize your time spent:

1.Start with runs in Spaceport or Buried City.

2.Target Leapers, Spotters, and Probes.

3.Conclude with a focused Night Raid in Stella Montis for the Medical Wing challenge.

By stacking compatible objectives during your deployments, you can significantly reduce your grind time and farm valuable items for long-term progression.Stay powerful, stay competitive. MMOexp ARC Raiders Items put the edge back in your hands.

The Week 18 Trials in ARC Raiders offer an engaging mix of exploration and combat. With smart map selections, strategic positioning, and effective route management, players can easily achieve three stars across all objectives in just a few concentrated play sessions.Upgrade your arsenal instantly—choose MMOexp for reliable cheap ARC Raiders Items and unstoppable gameplay.
ARC Raiders Beachcombing Guide: Dockmaster’s Detector Locations, How It Works, and Best Loot Strategy

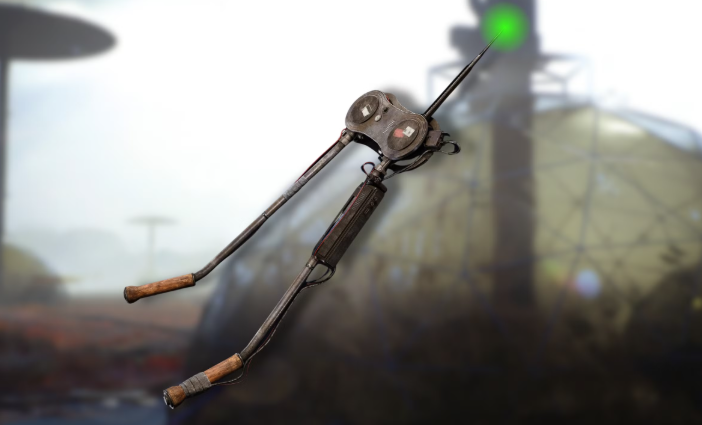
The Beachcombing system in ARC Raiders is one of the most unique additions in the Riven Tides update, turning exploration into a focused scavenging activity centered around buried loot and environmental scanning. Instead of traditional looting, players must now actively search the shoreline using a special tool called the Dockmaster’s Detector.

What Is Beachcombing in ARC Raiders?

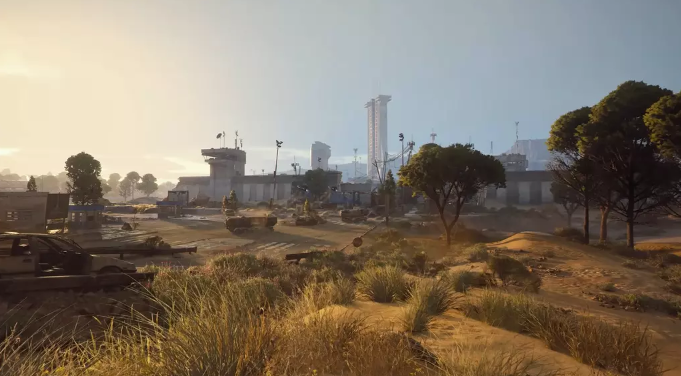
Beachcombing is a minor map condition exclusive to the Riven Tides map, where players can search beaches for buried loot using the Dockmaster’s Detector.

When active, the system changes how exploration works:

·Loot is buried under sand instead of in containers

·Players must actively scan areas to find hidden items

·The detector emits signals when near buried loot

·Digging reveals rewards ranging from materials to rare trinkets

This transforms the beach into a dynamic scavenging zone rather than a passive loot area.

What Is the Dockmaster’s Detector?

The Dockmaster’s Detector is a specialized,d quick-use gadget that functions like a metal detector during Beachcombing events.

Players equip it in a loadout slot and use it to:

·Scan sandy areas for buried loot

·Detect hidden caches beneath the surface

·Trigger dig prompts for extraction

·Locate rare event items like Ship Models

It behaves similarly to a utility tool rather than a weapon, meaning it must be planned into your loadout before entering a raid.

Without it, Beachcombing content is effectively inaccessible.

How to Get the Dockmaster’s Detector

There are multiple ways to obtain the detector, depending on your progression:

·Completing early questlines tied to Riven Tides

·Progressing Avian Alarm project stages

·Picking it up as loot in specific containers or raids

One of the most reliable early sources is completing introductory quests that reward the detector as part of progression milestones.

Because of its importance, many players prioritize acquiring it early to unlock Beachcombing farming routes for ARC Raiders Items.

How Beachcombing Works (Step-by-Step)

Once you enter a Beachcombing-enabled raid, the process is simple but skill-based:

1. Equip the Dockmaster’s Detector

Treat it like a utility item in your loadout before deployment.

2. Move Along the Shoreline

The best loot is concentrated in sandy beach zones of Riven Tides.

3. Scan for Signals

The detector will emit audio/visual feedback when near buried loot.

4. Dig at the Marked Location

Interact with the ground to uncover hidden caches.

5. Extract Safely

Loot ranges from crafting materials to rare event items.

What You Can Find in Beachcombing

Beachcombing is not just cosmetic-it is a high-value resource activity.

Possible rewards include:

·Crafting materials

·Weapon parts

·Rare consumables

·Event trinkets like Ship Models

Occasionally, we  are trapped or encounter dangerous caches

Some loot is directly tied to seasonal progression systems, making Beachcombing one of the most efficient ways to advance event objectives.

Best Beachcombing Location: Riven Tides Shoreline

The most effective area for Beachcombing is the Riven Tides shoreline, particularly:

·Dried seabed zones

·Open sandy stretches near the docks

·Coastal edges of major POIs

These areas offer:

·Dense buried loot clusters

·Fast scanning routes

·High chance of event item spawns

Efficient routes allow players to chain multiple dig sites in a single run, maximizing returns per raid.

Efficient Beachcombing Strategy

To get the most value from each run, players should follow a structured approach:

1. Focus on Linear Shoreline Routes

Avoid wandering inland-stick to beaches for maximum detector efficiency.

2. Prioritize Signal Strength Zones

Stronger detector signals usually mean higher-value loot.

3. Avoid Unnecessary Combat

Beachcombing runs are most efficient when focused on looting, not fighting.

4. Extract Early With High-Value Finds

Rare items should be secured immediately rather than risked in extended raids.

Why Beachcombing Matters for Progression

Beachcombing is not just a side activity-it plays a key role in progression systems introduced in Riven Tides.

It supports:

·Avian Alarm project advancement

·Last Resort event rewards

·Crafting material acquisition

·Collection of rare ARC Raiders Items

Because of its unique loot pool, Beachcombing often provides items that are difficult to obtain elsewhere.

Gear Progression and Blueprint Synergy

As players progress deeper into ARC Raiders, gear quality becomes increasingly important for survival during high-risk farming routes like Beachcombing.

Better equipment provides:

·Faster extraction under pressure

·Improved survivability in PvP encounters

·Safer navigation through ARC-infested zones

·More efficient farming loops

Blueprints play a major role in unlocking stronger gear and tools. Because of this, some players choose to buy ARC Raiders Blueprints to speed up progression and reduce reliance on rare drops.

When combined with Beachcombing farming, blueprint progression creates a powerful loop of resource gain and survival improvement.

Final Thoughts

The Beachcombing system in ARC Raiders adds a refreshing layer of exploration to the Riven Tides map, turning simple shoreline traversal into a high-reward scavenging activity powered by the Dockmaster’s Detector

How to Complete Switching the Supply in ARC Raiders

ARC Raiders, the third-person extraction shooter from Embark Studios, features a variety of focused quests that test your navigation, stealth, and strategic thinking. Among these, “Switching the Supply” stands out as a straightforward yet essential mission-one that rewards map knowledge and efficient execution. Whether you’re a solo player or part of a small squad, this guide will walk you through every step to complete the quest smoothly, avoid common pitfalls, and claim your well-deserved rewards. As a result, you will obtain more ARC Raiders BluePrints and other resources.

Understanding the Quest Objectives

Before diving into the mission, it’s critical to know what “Switching the Supply” requires. Unlike more complex quests in ARC Raiders, this one has simple, clear objectives that must be completed in a single run-fail to finish all steps in one go, and you’ll have to start over.

The core objectives are threefold: first, locate the underground tunnels beneath the Spaceport map; second, find and interact with a specific valve in these tunnels; and third, extract successfully (though some sources note the quest may complete immediately after turning the valve, extraction is still recommended to secure rewards). The quest is given by Celeste, one of the game’s five traders, and typically unlocks after completing her initial quest chain, around quests 30–35.

Step 1: Load Into the Spaceport Map

The entire quest takes place on the Spaceport map, so your first move is to select this location when matchmaking. For the fastest route, aim for a southern or central spawn near the launch towers-these areas offer the quickest access to the underground tunnels.

Once you’re on the Spaceport map, take a moment to open your map by pressing “M” (default keybind). Press “E” to toggle between the surface map and the underground tunnels map-this will help you plan your route and avoid getting lost in the maze of corridors belowground. The Spaceport is a PvP-heavy area, so move cautiously even before entering the tunnels; rival raiders often patrol the surface, especially near high-traffic areas like the launch towers.

Step 2: Find the Underground Tunnels Entrance

The underground tunnels are the heart of this quest, and finding their entrance is key to progress. While there are multiple entry points, some are more efficient than others.

The most direct entrance is located southwest of the central launch towers, near the departure building. Look for a rusted maintenance hatch, a half-open grating, or a cracked opening in the ground-these are common markers for tunnel access points. Another reliable entry is in the north loading bay area, marked by a ladder leading downward to the maintenance level.

If you’re combining this quest with “Clean Dream” (another Celeste quest), you’ll be glad to know both use the Spaceport’s underground tunnels and share overlapping routes. Completing them in the same run saves time and resources.

Step 3: Navigate the Tunnels and Locate the Valve

Once inside the tunnels, you’ll find a dimly lit network of concrete corridors, lit by flickering lights and lined with industrial piping. The tunnels stretch roughly 150–200 meters, so stick to the main path to avoid dead ends or ambushes.

To find the valve, follow the main corridor-ignore side passages, as they often lead to unnecessary encounters with ARC drones or rival players. The valve is easy to spot: it’s a red, steering-wheel-style valve attached to yellow piping, usually positioned at waist height near green filtration tanks in a wider chamber.

Move quietly to avoid drawing attention. Use silenced weapons or melee attacks to take down patrol drones, as loud noises will quickly attract reinforcements. If you’re playing solo, crouch and stick to the shadows; if in a squad, assign one player to scout ahead while others cover the rear.

When you reach the valve, approach it and hold the interact button (default “E”) for a few seconds. The quest will complete immediately once the valve is turned-even if you die afterward, you’ll still get credit for completing the objective.

Step 4: Extract Safely (and Claim Rewards)

While the quest may complete after turning the valve, extraction is still crucial to secure your rewards and avoid losing any loot you’ve collected. Don’t linger in the tunnels-head straight for an extraction point as soon as the valve is turned.

The best extraction points are the helipads above the launch towers or the raider hatches near the tunnel entrances. These locations are relatively safe, but keep an eye out for rival players who may be waiting to ambush you during extraction.

Completing “Switching the Supply” rewards you with valuable items, including a blue Renegade color variant, a Spaceport Trench Tower key (which unlocks high-loot areas), synthesized fuel, and cheap ARC Raiders Items. You may also receive a Raider Utility Suit or Vita Spray, depending on your progress in the game.

Pro Tips for a Smooth Completion

To make the quest even easier, keep these tips in mind. First, play during low-traffic hours or with the night raid modifier-this reduces PvP interference and makes it easier to navigate the tunnels unnoticed.

Second, avoid confusing the red objective valve with similar valves in side rooms-stick to the main corridor and look for the yellow piping to stay on track. If you get lost, follow the left wall of the tunnels; this will lead you back to the main path.

Finally, if you’re lightly geared or playing solo, prioritize speed over loot. Focus on finding the valve, turning it, and extracting-you can always return later to farm the Spaceport’s industrial zones for bonus loot.

Final Thoughts

“Switching the Supply” is a great introduction to ARC Raiders’ tunnel navigation and risk-reward gameplay. It’s simple enough for new players but still requires careful planning to avoid PvP encounters and complete objectives efficiently.

By following these steps-loading into the Spaceport, finding the tunnel entrance, navigating to the valve, and extracting safely-you’ll complete the quest in no time. Remember to use the underground map, move quietly, and prioritize your objectives, and you’ll be well on your way to earning those valuable rewards.

ARC Raiders Puzzle Walkthrough: Controlled Access Zone Guide

In ARC Raiders, not every high-value reward comes from combat alone—some are locked behind intricate mechanics that demand teamwork and planning. One of the most notable examples is the Controlled Access Zone in Dam Battlegrounds, a challenging puzzle encounter located in the northern part of the map between The Breach and the Power Generation Complex.

This activity has quickly earned a reputation as one of the most rewarding—and demanding—cooperative experiences in the game. For players looking to gather rare resources and push toward advanced crafting progression, learning how to complete it efficiently is well worth the effort.

The Controlled Access Zone is hidden within the dam itself. While there are multiple ways to approach it, the quickest route starts from the top of the structure.

Look for a ladder on the dam’s surface and descend into a large vertical shaft. Inside, you’ll find a complex interior made up of layered platforms, tight stairways, and partially flooded sections. This multi-level chute system is where the entire puzzle takes place.

A Challenge Built for Teamwork

This encounter cannot be completed alone.

Since squads are limited to three players, solving the puzzle requires at least one additional player from outside your group. That means forming temporary alliances or coordinating with others in the match.

Because of this, success relies heavily on communication, timing, and trust—not just combat ability.

Step-by-Step Puzzle Solution

Step 1: Search for the Fuel Cell

Your first objective is to locate a fuel cell somewhere within the chute system. Its spawn point is randomized each match, so you’ll need to explore thoroughly.

Common locations include:

Flooded lower levels

Underwater sections with poor visibility

Near destroyed ARC units

Along staircases and narrow walkways

The fuel cell can be difficult to spot, especially in water. Clearing nearby enemies before searching will make the process much safer.

Step 2: Activate the Power Unit

Once you’ve found the fuel cell:

Carry it to the upper level of the structure

Insert it into the machine positioned near the hanging Rocketeer

This will restore power and open a nearby room. Inside, you’ll find one of the four buttons required to continue.

Step 3: Locate the Remaining Buttons

There are four buttons in total:

One is always inside the unlocked room

The other three appear in random locations throughout the area

Check spots such as:

Behind industrial pipes

Along railings and stair platforms

Near support beams

Close to the vault door

In darker, less visible corners

Each player must stand at a separate button, so spreading out and communicating clearly is essential.

Step 4: Trigger All Buttons at Once

All four buttons must be pressed simultaneously.

Timing is critical here—if the activation isn’t perfectly synchronized, the puzzle will fail and need to be reset. Coordinating this while under pressure from enemies or other players adds to the difficulty.Unlock your full potential in ARC Raiders with premium ARC Raiders Items delivered fast and securely from MMOexp.

Step 5: Repair the Vault Entrance

After successfully activating the buttons, a second door becomes accessible. Instead of opening automatically, it requires repairs.

A panel will display a list of materials needed to unlock the vault. These requirements change each match and may include:

Metal components

Powercells

Mechanical parts

Industrial batteries

Your team must supply the exact items listed to proceed.

Preparation Is Key

The repair phase is often the biggest obstacle.

The required materials may not be nearby, and searching for them during the run increases your exposure to danger. To improve your chances of success:

Bring commonly required components into the match

Stockpile materials from previous runs

Coordinate inventory roles within your group

Good preparation minimizes risk and keeps your run efficient.

Vault Rewards

Once the door is repaired, you’ll gain access to a vault containing valuable loot, including:

High-tier crafting materials

Rare equipment and resources

Components for advanced upgrades

These rewards can significantly speed up your progression and help you unlock stronger gear faster.

Why This Puzzle Matters

The Controlled Access Zone is one of the most efficient activities for long-term progression in Dam Battlegrounds. Completing it regularly allows you to:

Collect rare materials more consistently

Reduce the grind for advanced crafting

Strengthen your loadout more quickly

Improve survivability in tougher encounters

Despite the risks, the rewards make it one of the most worthwhile objectives on the map.

The Controlled Access Zone puzzle captures the essence of ARC Raiders—a mix of strategy, unpredictability, and player interaction. It forces you to adapt not only to the environment but also to other players, whether they become allies or threats.Gear up for victory—get the best ARC Raiders Items today and dominate every Expedition!

Mastering this encounter takes practice, coordination, and preparation, but once you do, it becomes one of the most reliable ways to gain an edge in Dam Battlegrounds.From casual runs to high-stakes battles, MMOexp has the buy ARC Raiders BluePrints you need to thrive.