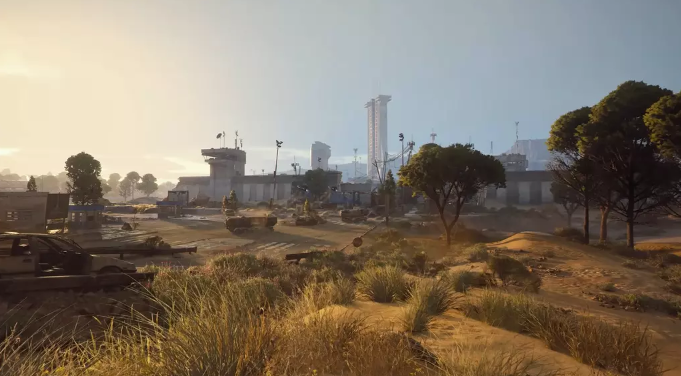
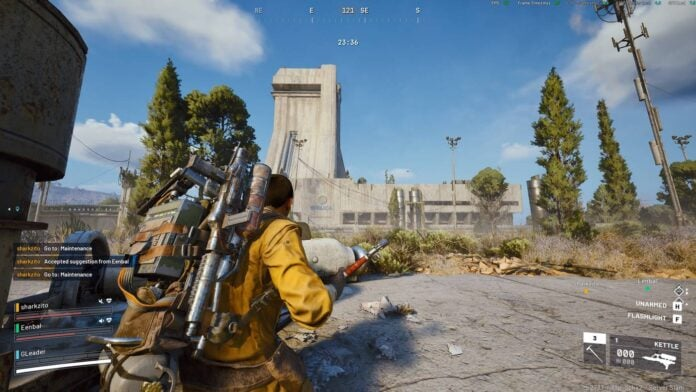
ARC Raiders:The Best Way to Finish Week 18 Trials

With the return of Weekly Trials in ARC Raiders, players can dive back into the action to earn stars and unlock valuable seasonal rewards after a brief break for the Expedition Window.

This comprehensive guide will outline each Week 18 Trial objective, the optimal maps to traverse, and effective strategies to quickly achieve three-star completions.

Each challenge can be tackled independently, so planning your route and selecting the right maps will enhance your efficiency.

Damage Leapers (Week 18 Trial)

Leapers are fierce foes in ARC Raiders, particularly in open environments. However, with the right positioning and weapon choices, you can handle them effectively.

Best Map:Launch Towers (Spaceport)

This location frequently spawns ARC activity and offers adequate cover.

Strategy Tips:

Use heavy weapons for reliable mid-range damage.

Stay partially covered before attacking.

Target the center core for maximum damage.

Avoid wide-open spaces unless threats are cleared.

To earn three stars, eliminate two Leapers during a major map event. Opt for high-intensity conditions to complete this quickly.

Loot Bird’s Nests (Bird City Condition)

For this trial, you need the Buried City map during the Bird City condition. If it’s not active, you’ll have to switch matches until it appears.

Looting Locations:

Head to rooftops.

Search within chimneys.

These nests contribute to your objective progress and often contain valuable collectibles for sale at Speranza.

Pro Tips:

Use mobility gear for swift rooftop navigation.

Eliminate nearby enemies before climbing.

Combine this objective with probe hunting if conditions align.

Damage Spotters (Week 18 Trial)

Spotters act as aerial support drones, marking players for Bombardiers, who can then become a significant threat.

Finding Spotters:

You can complete this trial on any map except Stella Montis. Spotters typically:

Fly in pairs.

Hover and scan the area.

Respawn after being destroyed.

Fast Completion Strategy:

Use a sniper or accurate mid-range weapon.

Stay in partial cover while aiming upward.

Prioritize Spotters before engaging Bombardiers.

Efficiently clearing the skies will help you quickly secure three stars.

Open ARC Probes (Week 18 Trial)

This challenge is one of the easiest of Week 18.

Probes Locations:

ARC Probes can appear on any map, with the best way to find them being:

Participating in the Prospecting Probes event.

Listening for the distinctive pinging sound.

Breaching Tips:

Clear nearby enemies before interacting.

Stay aware of your surroundings—as probes often attract combat.

Focus on quick breaches and collection to earn three stars swiftly.

Combining probe hunting with damage runs on Spotters can enhance efficiency.

Search Containers in the Medical Research Wing (Stella Montis)

This trial is specific to the Stella Montis map.

Search Locations:

Go to the western side of Stella Montis.

Locate and loot containers in the Medical Research Wing.

To secure three stars, you must:

1.Loot a sufficient number of containers.

2.Successfully extract.

Make your extraction quick once your loot goal is met. Ensure your gear is optimized before entering Stella Montis to improve your survival chances during these contested extractions.

Optimal Strategy for Week 18 Trials

To maximize your time spent:

1.Start with runs in Spaceport or Buried City.

2.Target Leapers, Spotters, and Probes.

3.Conclude with a focused Night Raid in Stella Montis for the Medical Wing challenge.

By stacking compatible objectives during your deployments, you can significantly reduce your grind time and farm valuable items for long-term progression.Stay powerful, stay competitive. MMOexp ARC Raiders Items put the edge back in your hands.

The Week 18 Trials in ARC Raiders offer an engaging mix of exploration and combat. With smart map selections, strategic positioning, and effective route management, players can easily achieve three stars across all objectives in just a few concentrated play sessions.Upgrade your arsenal instantly—choose MMOexp for reliable cheap ARC Raiders Items and unstoppable gameplay.

All Druid Uniques in Diablo 4

In Diablo 4, Druids stand as the guardians of nature, blending the raw power of beasts and the primal energy of the wilds. Their unique Diablo 4 Items are more than just gear-they are game-changers that define playstyles, turning ordinary builds into devastating forces. From shapeshifting enhancements to elemental mastery, each Druid unique serves a distinct purpose, catering to different playstyles and endgame goals.

1. Weapon Uniques: Primal Strikes and Shapeshift Fury

Weapon uniques for Druids focus on amplifying their core attacks, whether in human, werewolf, or werebear form. These items often tie into specific skills, turning basic strikes into area-of-effect (AOE) powerhouses or single-target juggernauts.

One iconic weapon is the “Greatstaff of the Crone.” This staff empowers Werewolf builds by reducing the cooldown of Werewolf skills by 20% and granting a 15% chance to trigger a free casting of “Lacerate” on hit. It’s a staple for players who prioritize fast, relentless attacks and want to maximize their shapeshifting potential.

Another key weapon is the “Mace of the Ancients,” designed for Werebear enthusiasts. It increases the damage of “Maul” by 30% and causes each hit to shock nearby enemies, chaining damage and crowd control. For players who prefer a slow-but-crushing playstyle, this mace is indispensable.

2. Armor Uniques: Nature’s Protection and Skill Synergy

Druid armor uniques are centered around survivability and skill synergy, leveraging the class’s connection to nature to shield against damage and boost ability effectiveness. These items often reward players for committing to a specific build archetype.

The “Hide of the Werewolf” is a legendary chest piece that enhances shapeshifting durability. It grants a 25% damage reduction while in Werewolf form and heals the Druid for 5% of their maximum health every time they land a critical hit. This armor is perfect for players who want to stay in Werewolf form for extended periods without sacrificing tankiness.

For elemental Druids, the “Cloak of the Talon” is a must-have. It increases the damage of all Storm skills by 20% and creates a lightning aura that damages nearby enemies when the Druid casts “Storm Strike.” It turns elemental builds into mobile damage dealers, ideal for clearing large packs of monsters.

3. Accessory Uniques: Utility and Build Defining Bonuses

Accessories-rings and amulets-are where Druids gain some of their most impactful unique bonuses. These items often bridge gaps in builds, adding utility, cooldown reduction, or skill amplification that can turn a good build into a great one.

The “Ring of the Werebear” is a game-changer for tank-focused builds. It increases the Druid’s maximum health by 30% and grants “Unstoppable” for 3 seconds whenever they transform into Werebear form. This ring solves the Druid’s biggest weakness-vulnerability to crowd control-while boosting their survivability.

The “Amulet of the Wilds” caters to hybrid builds, increasing the damage of both shapeshifting and elemental skills by 15%. It also reduces the cooldown of “Nature’s Fury” by 25%, allowing Druids to alternate between beast and elemental attacks seamlessly. This accessory is perfect for players who want to experiment with flexible, versatile playstyles.

4. Why Druid Uniques Matter in Endgame

In Diablo 4’s endgame, Druid uniques are not just luxury items-they are essential for tackling high-difficulty content like Nightmare Dungeons and Uber Bosses. Each unique fills a specific niche, allowing players to tailor their builds to counter tough enemies or optimize for speed.

Whether you’re a shapeshifting brute, an elemental mage, or a hybrid of both, Druid uniques offer the tools to refine your playstyle. They reward experimentation, encouraging players to mix and match items to find the perfect combination for their goals. At the same time, utilizing cheap Diablo 4 materials allows you to quickly grow stronger and adapt to a wider variety of playstyles.

In the end, Druid uniques embody the class’s essence-adaptable, powerful, and deeply connected to the wilds. They turn the Druid from a versatile class into a force to be reckoned with, ensuring that every playthrough feels unique and rewarding.

MLB The Show 26 Competitive Hitting Tips Online

Hitting online in MLB The Show 26 is a major step up from offline play. Against AI, you can learn patterns and predict behavior, but real opponents are unpredictable—they change speeds, mix locations, and adjust their strategy as the game goes on. To stay competitive in modes like Diamond Dynasty or online head-to-head, you need more than quick reflexes. You need awareness, discipline, and a consistent approach.

This guide breaks down the core habits and adjustments that help you become a more reliable hitter online.

1.Learn What Actually Controls Hitting Success

    Before focusing on advanced strategy, you need to understand how hitting works at its core.

    Timing is everything

    Every swing depends on your ability to match pitch speed. Being early or late leads to weak contact or missed opportunities. Online pitchers actively try to disrupt timing, so staying consistent is critical.

    Choose your hitting system wisely

    Different input styles change how you approach at-bats:

    Zone hitting: full PCI control and highest precision
    Directional hitting: simpler, more placement-based approach
    Timing hitting: focuses entirely on swing timing

    Zone hitting is generally preferred for competitive play because it offers the most control over contact and placement.

    Avoid predictable patterns

    If you swing the same way every at-bat, skilled opponents will adjust quickly. Varying your approach makes you harder to exploit.

    2.Train Your Eye for Pitch Recognition

      Good hitters don’t just react—they identify pitches early.

      Understand pitch behavior

      Fastballs, sliders, curveballs, and changeups each move differently. Recognizing them quickly gives you more time to adjust your swing.

      Watch the release, not the result

      The most important information comes from the pitcher’s release point. Training your eyes there improves reaction time dramatically.

      Expect constant variation

      Online players mix speeds and locations to break your rhythm. If you lock into one timing pattern, you’ll struggle to adjust.

      3.Improve Swing Control and Discipline

        Strong hitting is less about swinging often and more about swinging correctly.

        Use practice tools consistently

        Training modes help build timing and recognition without pressure, making them one of the fastest ways to improve.

        Mix your swing types intentionally

        Different situations call for different approaches:

        Contact swings for consistency
        Power swings when you’re ahead in the count
        Directional swings for situational placement

        Be selective at the plate

        Chasing bad pitches is one of the biggest mistakes online. Let pitchers work into your advantage instead of forcing contact.

        4.Read and Adapt to Your Opponent

          Online games are dynamic, and adapting is just as important as mechanics.

          Identify pitching habits early

          Most players fall into patterns—repeating pitch types or favoring certain locations in specific counts.

          Adjust your approach mid-game

          Once you notice trends, shift your timing and strategy to counter them.

          Exploit repetition

          If an opponent relies too heavily on a specific pitch or sequence, adjust your stance and timing to punish it.

          5.Optimize Your Setup for Smoother Gameplay

            Skill is the foundation, but your setup can improve consistency and reaction time.

            Use a clear, readable camera

            A good batting camera helps you track pitches earlier. Strike Zone-style views are commonly used because they simplify pitch recognition.Step up to the plate with confidence—get your MLB The Show 26 Stubs from MMOexp and build the ultimate Diamond Dynasty roster today.

            Adjust controller settings for comfort

            Sensitivity, button layout, and vibration settings can all influence how responsive your inputs feel during key moments.

            Practice regularly in low-pressure environments

            Repetition builds consistency. The more time you spend in training situations, the more stable your timing becomes in online games.

            Success in online play in MLB The Show 26 comes down to a mix of timing, discipline, and adaptability. Step up to the plate with confidence—get your buy MLB The Show 26 Stubs from MMOexp and build the ultimate Diamond Dynasty roster today.Players who can recognize pitches early, stay patient at the plate, and adjust to opponent behavior will consistently outperform those who rely on guesswork or raw reaction alone.

            ARC Raiders Beachcombing Guide: Dockmaster’s Detector Locations, How It Works, and Best Loot Strategy

            The Beachcombing system in ARC Raiders is one of the most unique additions in the Riven Tides update, turning exploration into a focused scavenging activity centered around buried loot and environmental scanning. Instead of traditional looting, players must now actively search the shoreline using a special tool called the Dockmaster’s Detector.

            What Is Beachcombing in ARC Raiders?

            Beachcombing is a minor map condition exclusive to the Riven Tides map, where players can search beaches for buried loot using the Dockmaster’s Detector.

            When active, the system changes how exploration works:

            ·Loot is buried under sand instead of in containers

            ·Players must actively scan areas to find hidden items

            ·The detector emits signals when near buried loot

            ·Digging reveals rewards ranging from materials to rare trinkets

            This transforms the beach into a dynamic scavenging zone rather than a passive loot area.

            What Is the Dockmaster’s Detector?

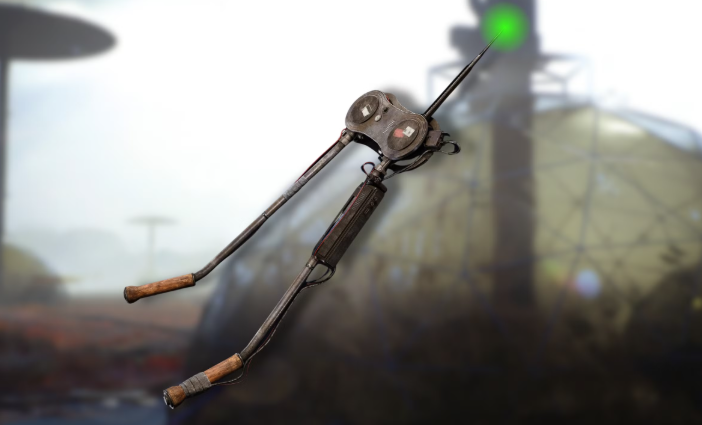
            The Dockmaster’s Detector is a specialized,d quick-use gadget that functions like a metal detector during Beachcombing events.

            Players equip it in a loadout slot and use it to:

            ·Scan sandy areas for buried loot

            ·Detect hidden caches beneath the surface

            ·Trigger dig prompts for extraction

            ·Locate rare event items like Ship Models

            It behaves similarly to a utility tool rather than a weapon, meaning it must be planned into your loadout before entering a raid.

            Without it, Beachcombing content is effectively inaccessible.

            How to Get the Dockmaster’s Detector

            There are multiple ways to obtain the detector, depending on your progression:

            ·Completing early questlines tied to Riven Tides

            ·Progressing Avian Alarm project stages

            ·Picking it up as loot in specific containers or raids

            One of the most reliable early sources is completing introductory quests that reward the detector as part of progression milestones.

            Because of its importance, many players prioritize acquiring it early to unlock Beachcombing farming routes for ARC Raiders Items.

            How Beachcombing Works (Step-by-Step)

            Once you enter a Beachcombing-enabled raid, the process is simple but skill-based:

            1. Equip the Dockmaster’s Detector

            Treat it like a utility item in your loadout before deployment.

            2. Move Along the Shoreline

            The best loot is concentrated in sandy beach zones of Riven Tides.

            3. Scan for Signals

            The detector will emit audio/visual feedback when near buried loot.

            4. Dig at the Marked Location

            Interact with the ground to uncover hidden caches.

            5. Extract Safely

            Loot ranges from crafting materials to rare event items.

            What You Can Find in Beachcombing

            Beachcombing is not just cosmetic-it is a high-value resource activity.

            Possible rewards include:

            ·Crafting materials

            ·Weapon parts

            ·Rare consumables

            ·Event trinkets like Ship Models

            Occasionally, we  are trapped or encounter dangerous caches

            Some loot is directly tied to seasonal progression systems, making Beachcombing one of the most efficient ways to advance event objectives.

            Best Beachcombing Location: Riven Tides Shoreline

            The most effective area for Beachcombing is the Riven Tides shoreline, particularly:

            ·Dried seabed zones

            ·Open sandy stretches near the docks

            ·Coastal edges of major POIs

            These areas offer:

            ·Dense buried loot clusters

            ·Fast scanning routes

            ·High chance of event item spawns

            Efficient routes allow players to chain multiple dig sites in a single run, maximizing returns per raid.

            Efficient Beachcombing Strategy

            To get the most value from each run, players should follow a structured approach:

            1. Focus on Linear Shoreline Routes

            Avoid wandering inland-stick to beaches for maximum detector efficiency.

            2. Prioritize Signal Strength Zones

            Stronger detector signals usually mean higher-value loot.

            3. Avoid Unnecessary Combat

            Beachcombing runs are most efficient when focused on looting, not fighting.

            4. Extract Early With High-Value Finds

            Rare items should be secured immediately rather than risked in extended raids.

            Why Beachcombing Matters for Progression

            Beachcombing is not just a side activity-it plays a key role in progression systems introduced in Riven Tides.

            It supports:

            ·Avian Alarm project advancement

            ·Last Resort event rewards

            ·Crafting material acquisition

            ·Collection of rare ARC Raiders Items

            Because of its unique loot pool, Beachcombing often provides items that are difficult to obtain elsewhere.

            Gear Progression and Blueprint Synergy

            As players progress deeper into ARC Raiders, gear quality becomes increasingly important for survival during high-risk farming routes like Beachcombing.

            Better equipment provides:

            ·Faster extraction under pressure

            ·Improved survivability in PvP encounters

            ·Safer navigation through ARC-infested zones

            ·More efficient farming loops

            Blueprints play a major role in unlocking stronger gear and tools. Because of this, some players choose to buy ARC Raiders Blueprints to speed up progression and reduce reliance on rare drops.

            When combined with Beachcombing farming, blueprint progression creates a powerful loop of resource gain and survival improvement.

            Final Thoughts

            The Beachcombing system in ARC Raiders adds a refreshing layer of exploration to the Riven Tides map, turning simple shoreline traversal into a high-reward scavenging activity powered by the Dockmaster’s Detector

            How to Complete Switching the Supply in ARC Raiders

            ARC Raiders, the third-person extraction shooter from Embark Studios, features a variety of focused quests that test your navigation, stealth, and strategic thinking. Among these, “Switching the Supply” stands out as a straightforward yet essential mission-one that rewards map knowledge and efficient execution. Whether you’re a solo player or part of a small squad, this guide will walk you through every step to complete the quest smoothly, avoid common pitfalls, and claim your well-deserved rewards. As a result, you will obtain more ARC Raiders BluePrints and other resources.

            Understanding the Quest Objectives

            Before diving into the mission, it’s critical to know what “Switching the Supply” requires. Unlike more complex quests in ARC Raiders, this one has simple, clear objectives that must be completed in a single run-fail to finish all steps in one go, and you’ll have to start over.

            The core objectives are threefold: first, locate the underground tunnels beneath the Spaceport map; second, find and interact with a specific valve in these tunnels; and third, extract successfully (though some sources note the quest may complete immediately after turning the valve, extraction is still recommended to secure rewards). The quest is given by Celeste, one of the game’s five traders, and typically unlocks after completing her initial quest chain, around quests 30–35.

            Step 1: Load Into the Spaceport Map

            The entire quest takes place on the Spaceport map, so your first move is to select this location when matchmaking. For the fastest route, aim for a southern or central spawn near the launch towers-these areas offer the quickest access to the underground tunnels.

            Once you’re on the Spaceport map, take a moment to open your map by pressing “M” (default keybind). Press “E” to toggle between the surface map and the underground tunnels map-this will help you plan your route and avoid getting lost in the maze of corridors belowground. The Spaceport is a PvP-heavy area, so move cautiously even before entering the tunnels; rival raiders often patrol the surface, especially near high-traffic areas like the launch towers.

            Step 2: Find the Underground Tunnels Entrance

            The underground tunnels are the heart of this quest, and finding their entrance is key to progress. While there are multiple entry points, some are more efficient than others.

            The most direct entrance is located southwest of the central launch towers, near the departure building. Look for a rusted maintenance hatch, a half-open grating, or a cracked opening in the ground-these are common markers for tunnel access points. Another reliable entry is in the north loading bay area, marked by a ladder leading downward to the maintenance level.

            If you’re combining this quest with “Clean Dream” (another Celeste quest), you’ll be glad to know both use the Spaceport’s underground tunnels and share overlapping routes. Completing them in the same run saves time and resources.

            Step 3: Navigate the Tunnels and Locate the Valve

            Once inside the tunnels, you’ll find a dimly lit network of concrete corridors, lit by flickering lights and lined with industrial piping. The tunnels stretch roughly 150–200 meters, so stick to the main path to avoid dead ends or ambushes.

            To find the valve, follow the main corridor-ignore side passages, as they often lead to unnecessary encounters with ARC drones or rival players. The valve is easy to spot: it’s a red, steering-wheel-style valve attached to yellow piping, usually positioned at waist height near green filtration tanks in a wider chamber.

            Move quietly to avoid drawing attention. Use silenced weapons or melee attacks to take down patrol drones, as loud noises will quickly attract reinforcements. If you’re playing solo, crouch and stick to the shadows; if in a squad, assign one player to scout ahead while others cover the rear.

            When you reach the valve, approach it and hold the interact button (default “E”) for a few seconds. The quest will complete immediately once the valve is turned-even if you die afterward, you’ll still get credit for completing the objective.

            Step 4: Extract Safely (and Claim Rewards)

            While the quest may complete after turning the valve, extraction is still crucial to secure your rewards and avoid losing any loot you’ve collected. Don’t linger in the tunnels-head straight for an extraction point as soon as the valve is turned.

            The best extraction points are the helipads above the launch towers or the raider hatches near the tunnel entrances. These locations are relatively safe, but keep an eye out for rival players who may be waiting to ambush you during extraction.

            Completing “Switching the Supply” rewards you with valuable items, including a blue Renegade color variant, a Spaceport Trench Tower key (which unlocks high-loot areas), synthesized fuel, and cheap ARC Raiders Items. You may also receive a Raider Utility Suit or Vita Spray, depending on your progress in the game.

            Pro Tips for a Smooth Completion

            To make the quest even easier, keep these tips in mind. First, play during low-traffic hours or with the night raid modifier-this reduces PvP interference and makes it easier to navigate the tunnels unnoticed.

            Second, avoid confusing the red objective valve with similar valves in side rooms-stick to the main corridor and look for the yellow piping to stay on track. If you get lost, follow the left wall of the tunnels; this will lead you back to the main path.

            Finally, if you’re lightly geared or playing solo, prioritize speed over loot. Focus on finding the valve, turning it, and extracting-you can always return later to farm the Spaceport’s industrial zones for bonus loot.

            Final Thoughts

            “Switching the Supply” is a great introduction to ARC Raiders’ tunnel navigation and risk-reward gameplay. It’s simple enough for new players but still requires careful planning to avoid PvP encounters and complete objectives efficiently.

            By following these steps-loading into the Spaceport, finding the tunnel entrance, navigating to the valve, and extracting safely-you’ll complete the quest in no time. Remember to use the underground map, move quietly, and prioritize your objectives, and you’ll be well on your way to earning those valuable rewards.