

Tag: Diablo 4 gold

Diablo 4 Season 10 Spiritborn Build: Mastering Evade Mechanics

The Spiritborn remains one of the most versatile and exciting classes in Diablo 4, and in Season 10: Infernal Chaos, the Evade Spiritborn takes center stage as one of the strongest endgame builds available. Five seasons after its debut, the class has received buffs, reworks, and new layers of customization, all of which make the Evade-focused playstyle more powerful than ever.

This guide breaks down why the Evade Spiritborn is dominating Season 10, the gear you’ll need to unlock its potential, the skills that define its gameplay loop, and the pros and cons of committing to this demanding but incredibly rewarding build.

Why the Evade Spiritborn Dominates in Season 10

The Spiritborn class excels at balancing offense and defense while weaving mobility into its kit. The Evade archetype has always been popular because it allows players to deal damage while dodging attacks. This dual-purpose approach makes the build ideal for both hardcore survivalists and aggressive endgame grinders.

In Season 10, the reworked Eagle Primary Spirit Hall ensures that every cast of Evade or an Eagle skill releases feather projectiles, creating a near-constant stream of damage. Combined with Thunderspike’s cooldown reduction, the Evade Spiritborn has evolved into an S-Tier build for clearing hordes of enemies in Nightmare Dungeons, surviving Infernal Hordes, and tackling bosses with consistent DPS output.

The real beauty of the build is its uptime. By cycling skills strategically and leveraging cooldown resets, Evade becomes not only a mobility option but also a constant source of projectile damage, making it one of the most efficient builds in Diablo 4’s Season of Infernal Chaos.

Core Skills for the Evade Spiritborn

The Evade Spiritborn uses a streamlined skill set that maximizes damage, control, and survivability. Here are the core abilities you’ll rely on:

·Thunderspike – The lynchpin of the build. Reduces Evade’s cooldown and triggers the Eagle Spirit Hall projectile effect.

·Vortex – Provides powerful AoE damage while grouping enemies for projectile barrages.

·The Seeker – A reliable Eagle Skill that supplements your damage and keeps projectiles flowing.

·Counterattack – A defensive option that punishes enemies who connect with attacks.

·Armored Hide – Your main damage reduction tool, critical for surviving high-tier endgame content.

The rotation prioritizes keeping Evade active, weaving in Thunderspike to accelerate cooldown recovery, and using Vortex to keep enemies grouped for maximum feather projectile effectiveness.

Gear Requirements: Chaos Uniques

Unlike some builds that can thrive with flexible gear choices, the Evade Spiritborn is highly item-dependent. At minimum, it requires five Chaos Uniques, each of which synergizes perfectly with the build’s playstyle:

1. Sepazontec – Enhances Thunderspike, scaling your primary damage tool into the late game.

2. Wushe Nak Pa – Boosts the projectile damage granted by the Eagle Spirit Hall.

3. Loyalty’s Mantle – Increases Spirit Hall potency if Eagle is chosen for both Primary and Secondary, multiplying your overall DPS.

4. Jacinth Shell – A high-risk Unique that reduces cooldowns dramatically but constantly drains health. Mastering it requires careful play and strong healing.

5. Band of First Breath – Enhances both offense and defense by triggering Armored Hide when Evade is cast.

Why Chaos Versions Matter

Season 10’s Chaos Armor mechanic makes these Uniques even stronger. Chaos versions drop with maximum affix rolls and a 20% boost to their Unique Affixes, eliminating RNG frustration and giving the Evade Spiritborn reliable scaling.

Myths to Elevate the Build

While the Chaos Uniques are essential, the Evade Spiritborn truly becomes an endgame monster when paired with powerful Mythic items. For players willing to farm Infernal Hordes and Chaos Rifts-or even use Diablo IV Items to speed up the grind- Mythics are game-changing:

·Shroud of False Death – Boosts all passives by +1 while enhancing movement speed and damage. Perfect synergy with the Spiritborn’s mobile playstyle.

·Harlequin Crest – The returning fan-favorite, granting a universal 20% cooldown reduction. This keeps Evade active almost permanently and ensures you can weave skills seamlessly.

Acquiring both Mythics along with the required Chaos Uniques takes patience, but the result is a build that feels unstoppable across all forms of content.

Gameplay Loop and Rotation

The Evade Spiritborn’s playstyle is built on fluidity. Here’s how you’ll approach combat:

1. Open with Vortex to group enemies tightly.

2. Cast Thunderspike repeatedly to reduce Evade’s cooldown.

3. Use Evade offensively and defensively-triggering feather projectiles while dodging hits.

4. Activate The Seeker for additional damage during downtime.

5. Maintain Counterattack and Armored Hide for defensive stability.

At peak efficiency, you’ll weave Thunderspike and Evade together so smoothly that your character rarely stops moving or firing projectiles. Bosses fall to consistent pressure, while large enemy packs are shredded by waves of feathers.

Pros and Cons of the Evade Spiritborn

Every build comes with trade-offs, and the Evade Spiritborn is no exception. Here’s a breakdown:

Pros

·S-Tier Damage Output – Near-constant projectiles and boosted Thunderspike bursts melt enemies.

·Extreme Mobility – Evade doubles as damage and repositioning, making the build feel incredibly agile.

·Solid Survivability – Armored Hide, Counterattack, and defensive Chaos Uniques provide strong layers of protection.

Cons

·Gear Dependent – Requires five Chaos Uniques and ideally two Mythics to reach full potential.

·High Risk – Items like Jacinth Shell demand precise health management.

·Farm-Heavy – New players or casual grinders may struggle to assemble the required gear.

Farming and Progression Tips

Because this build is so gear-dependent, efficiency in farming is critical. Here are some quick tips to speed things up:

·Target Infernal Hordes for Chaos Uniques. Bartuc’s Horde has the highest drop chance.

·Run Chaos Rifts consistently for Mythic chances.

·Use trading hubs to buy Diablo IV Items if farming isn’t yielding results. This can save weeks of grind and let you enjoy the build faster.

·Prioritize Sepazontec first, as it unlocks the build’s full DPS loop.

Final Thoughts: Is the Evade Spiritborn Worth It?

The Evade Spiritborn is not the easiest build to put together in Diablo 4 Season 10. It requires multiple Chaos Uniques, at least one Mythic, and a serious time investment in farming. However, for players willing to chase the full setup, the payoff is enormous:

·Unmatched mobility and damage uptime.

·Consistent performance in both AoE and boss fights.

·A rewarding, skill-based playstyle that feels unique in the current meta.

For grinders, traders, or anyone willing to buy Diablo IV Items to shortcut the process, this is one of the most satisfying and powerful builds available in the Season of Infernal Chaos.

If you’re looking for a build that blends agility, survivability, and relentless DPS, the Evade Spiritborn is absolutely worth your time. Get your Chaos gear, chase those Mythics, and prepare to carve your way through Sanctuary with one of the best endgame setups Diablo 4 has ever offered.

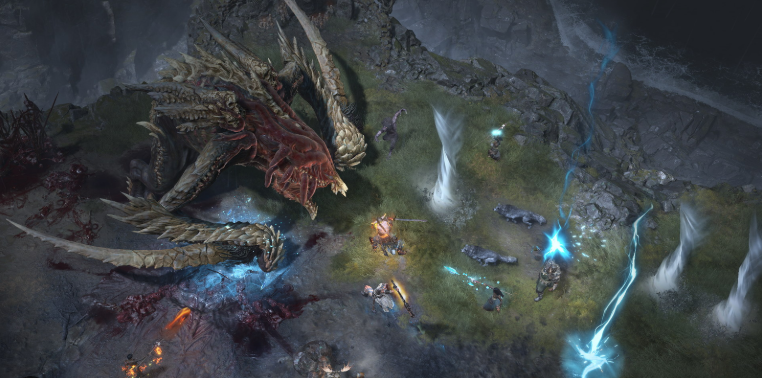
Diablo 4 Season 10 Class Tier List-Best Builds for Infernal Chaos

Season 10 of Diablo 4, Infernal Chaos, shakes up the endgame once again with the arrival of Infernal Hordes and the hunt for Chaos Uniques. With both Pits and hordes demanding different strengths, the meta has shifted-and not all classes are keeping up. If you want to clear high-tier content efficiently, knowing which builds rise above the rest is essential.

Why This Tier List Matters

Season 10 isn’t just about raw power-it’s about efficiency in two key areas:

1.Infernal Hordes Farming-The only consistent way to acquire Chaos Uniques, making horde-clearing speed a top priority.

2.Pit Progression-The benchmark for true endgame strength, with Tier 100+ clears separating strong builds from great ones.

3.Versatility-Some builds excel in Pits but crumble in hordes, while the best dominate both. That balance defines our tier placements.

S-Tier Classes

Druid-Raven Build (Bugged but Unstoppable)

Highlight:Holds the highest Pit clear on record (Tier 150).

Why It’s S-Tier:Massive AoE and auto-targeting Ravens shred both Pits and hordes. Even without bugged damage loops, the build is brutally effective.

Weakness:Likely nerfs to infinite-damage interactions. The core build, however, remains top-tier.

Pro Tip:Stack Intelligence and hunt for uniques like Chaosfeather Mantle to scale damage to absurd levels.Get your Diablo 4 gold from MMOexp and unleash your true potential in Sanctuary!

Necromancer-Blood Wave & Tornado Storm

Blood Wave:Still capable of clearing well past Tier 130 despite nerfs.

Tornado Storm:Endless whirlwinds cover the map, melting hordes faster than almost any build.

Why It’s S-Tier:Dominant AoE, solid bossing, and strong mobility options make Necro one of the safest and most consistent classes in Season 10.

Gear Tip:Blackflame Phylactery and Skull of Tyrant’s Will are key for damage and survivability.

Sorcerer-Super Ball Lightning & Hydra

Ball Lightning:Exploits multipliers to vaporize entire screens when procs align.

Hydra:A simpler but highly reliable option for both hordes and Pits.

Why It’s S-Tier:Unmatched speed thanks to Teleport, incredible farming efficiency, and unrivaled scaling.

Why Sorc Is King:If your goal is farming Chaos Uniques faster than anyone else, Sorc is the clear #1.

A-Tier Classes

Spiritborn-Stinger & Spirit Variants

Why It’s A-Tier:Strong synergy with Chaos Uniques (Loyalty’s Mantle, Wuokpa) and the ability to push over Tier 110. A sleeper pick for those who want variety.

Weakness:Less consistent damage than Sorc/Necro and lacks true burst potential.

Pro Tip:Farm aggressively to collect rare crafting mats and high-value uniques-closing the gap to S-Tier requires investment.

Barbarian-HOTA (Hammer of the Ancients)

Highlight:Capable of Tier 100–110 clears.

Why It’s A-Tier:Flexible, especially with autocast shouts for smoother play.

Weakness:Infernal Hordes expose Barb lack of AoE speed-fine for Pit pushing, poor for Chaos farming.

Pro Tip:Prioritize weapon rolls and cooldown reduction to keep momentum going.

B-Tier (and Below)

Rogue-Once Again Struggling

Highlight:Death Trap and Flurry are viable, but neither breaks into top-tier.

Why It’s B-Tier:Resource problems and lackluster synergy with Season 10 mechanics leave Rogue far behind Sorc, Necro, and Druid.

Final Rankings-Best Classes for Season 10

Top Competitive Picks:Sorcerer (Ball Lightning, Hydra), Necromancer (Blood Wave, Tornado Storm), Druid (Ravens).

Strong but Secondary:Spiritborn (Stinger/Spirit builds), Barbarian (HOTA).

Needs Buffs:Rogue.

Season 10 meta is one of the most chaotic yet, with Sorcerer, Necromancer, and Druid clearly leading the pack. Sorc dominates for speed and farming, Necro excels in versatility and AoE, and Druid offers unmatched raw power with its Raven build. Spiritborn is an exciting wildcard, while Barb and Rogue are lagging behind until future buffs.

At the end of the day, play what’s fun-but if your goal is fast clears, efficient farming, and the best shot at Chaos Uniques, you can’t go wrong with Sorc, Necro, or Druid.buy Diablo IV Items from MMOexp now and start your path to victory!

Diablo 4: The Traveler’s Prayer Quest Walkthrough

Diablo 4, the latest installment in Blizzard’s iconic action RPG series, has introduced a wide range of new quests and challenges that players can immerse themselves in. Among these is a compelling quest titled The Traveler’s Prayer, a side quest that has piqued the interest of many adventurers in Sanctuary. This quest offers a mix of engaging narrative and intense combat, all while providing players with the opportunity to explore the immersive world of Diablo 4 even further.

In this guide, we will provide a detailed walkthrough for The Traveler’s Prayer quest, discussing how to start it, the objectives you’ll need to complete, and tips to ensure your success.

Understanding The Traveler’s Prayer Quest

The Traveler’s Prayer is a side quest that players encounter while exploring the vast open world of Diablo 4 Gold. The quest is particularly interesting for those who love lore-heavy side stories and a touch of mystery.

The quest begins when players stumble upon a traveler’s camp, where they are introduced to a mysterious figure who offers a prayer for the protection of the land. This seemingly simple encounter sets the stage for a journey that involves more than just the typical dungeon crawls. The questline takes players through a series of spiritual and combat-related trials, all the while uncovering the darker side of the world and the secrets hidden in the wilderness.

How to Start the Quest

To begin The Traveler’s Prayer, players must be exploring certain regions of Diablo 4’s expansive world. The quest becomes available after reaching a particular point in the game’s story or when exploring specific areas in the open world, particularly near the border between the Scosglen and Fractured Peaks regions.

Find the Traveler: The first step is to locate a campfire near a crossroads, which you’ll often find while exploring the wilderness. The traveler will be a non-playable character (NPC) who can be identified by their distinctive garb. They will be surrounded by signs of a long journey — a worn pack, an open book with a few pages scattered, and sometimes an altar or shrine.

Engage in Dialogue: Upon interacting with the NPC, you will learn about the Traveler’s prayer. They’ll speak of a lost relic that once brought peace to the world, now shrouded in darkness, and ask for your help in reclaiming it. The Traveler believes that if the prayer is offered at the right altar, it will restore balance and perhaps provide the world with salvation.

Accept the Quest: After listening to the Traveler’s plea, you’ll be prompted to accept the quest. This begins your adventure in uncovering the fate of the Traveler’s relic and the prayer that goes along with it.

Quest Objectives

Once you’ve accepted The Traveler’s Prayer, your quest log will detail several key objectives that will drive you through the story. Below are the main goals you’ll need to complete.

Investigate the Altar of Light: The first objective of the quest is to visit the Altar of Light, a sacred site that plays a pivotal role in the quest. To reach the altar, you’ll need to navigate through the wilderness, battling monsters and traversing dangerous terrain.

Tips for Exploration: The wilderness in Diablo 4 is teeming with enemies and environmental hazards. Be prepared to face groups of hostile creatures, including wolves, ghouls, and corrupted spirits. Make sure your character is equipped with the right gear and abilities to handle the various threats that will appear.

Altar Location: The Altar of Light is located on the far northern edge of the Scosglen region, not far from the Broken Peaks. The exact location might be marked on your map once you accept the quest, so keep an eye out for quest markers.

Fight the Cursed Protectors: Upon reaching the Altar of Light, you will be confronted by a group of powerful cursed guardians, also known as the Protectors. These enemies are spirits that once defended the altar but have been corrupted by dark forces.

Combat Strategy: The Protectors are formidable foes, often using powerful elemental attacks and summoning minions to assist them. To overcome them, you’ll need to focus on both offense and defense. Use ranged abilities to take down the minions quickly and save your most powerful attacks for the Protectors themselves.

Retrieve the Relic: Once the Protectors are defeated, you’ll have access to the altar. At this point, your character must retrieve the ancient relic, a key item in the quest. The relic is said to contain the remnants of an ancient prayer that could restore peace to Sanctuary, but it’s also highly coveted by the forces of darkness.

Puzzle Mechanics: Before you can take the relic, you’ll encounter a puzzle that tests your ability to decipher the old inscriptions found on the altar. The puzzle involves rotating stones or activating certain mechanisms in the right order. It’s not too difficult, but be prepared for the solution torequire some trial and error.

Visit the Shrine of Purity: After retrieving the relic, your next destination is the Shrine of Purity. This shrine is located deeper into the Fractured Peaks region, an area known for its treacherous mountain paths and powerful monsters.

Survival Tips: The journey to the Shrine of Purity isn’t easy. You’ll need to navigate through snowstorms, deal with more aggressive wildlife, and protect the relic from being stolen by rival factions. Keep your wits about you and avoid getting bogged down in unnecessary battles.

Perform the Prayer at the Shrine: Upon reaching the Shrine of Purity, you will be tasked with offering the relic and performing the prayer. This is the final stage of the quest, and the completion of this act will determine the fate of the world.

Boss Fight: As you attempt to perform the prayer, a massive boss fight will ensue. A dark and powerful entity, known as the Shadow of the Traveler, will manifest and try to stop you. The Shadow is a formidable boss with many different phases, including the summoning of minions and casting devastating spells.

Strategy: The Shadow will constantly shift between physical and magical attacks, so be ready to dodge and adapt. Use mobility to avoid its area-of-effect spells and focus on whittling down its health over time. Be mindful of your positioning as the arena can become littered with hazardous zones during the fight.

Tips for Success

Maximize Your Character Build: Before embarking on The Traveler’s Prayer, make sure your character is properly geared and has the optimal build. The enemies you encounter can be tough, so having a well-rounded character with both offensive and defensive capabilities will give you an edge.

Watch for Environmental Hazards: The Altar of Light and Shrine of Purity are not only filled with enemies but also dangerous environmental hazards, including traps and natural obstacles. Be sure to scan the environment carefully to avoid these pitfalls during the quest.

Use Your Mount: If you’re finding the journey to be too long or dangerous, don’t forget to utilize your mount. Diablo 4’s open world is vast, and your mount can make a significant difference in traveling faster while avoiding excessive enemy encounters.

Team Up: If the quest proves too difficult or if you’re facing the boss at the Shrine of Purity, consider teaming up with other players. Diablo 4’s multiplayer system allows you to form parties with others to tackle difficult content together, making the experience more enjoyable and manageable.

Conclusion

The Traveler’s Prayer is one of the more intriguing side quests in buy Diablo 4 materials, offering a rich blend of lore, puzzle-solving, and combat. It tests players’ skills in multiple areas, from exploration to boss fights, all while telling a poignant story about the fate of a mystical relic. By following this walkthrough, you should be able to tackle the quest with confidence, understanding each step and knowing how to approach the challenges it presents.

Whether you’re a seasoned Diablo veteran or a newcomer to the series, The Traveler’s Prayer will keep you on the edge of your seat as you uncover the mysteries of Sanctuary and ensure that the prayer is offered at the right moment to save the world from impending darkness.

Mastering AoE Abilities to Dominate Goblins in Diablo IV Season 5

Diablo IV continues to challenge players with its ever-evolving world, fierce battles, and deep strategy. With the launch of Season 5, a new foe takes center stage: the elusive goblin. These tricky enemies carry some of the best loot in the game but are notorious for fleeing as soon as danger arises. To hunt them effectively, mastering Area of Effect (AoE) abilities is crucial. Get ready to dive into the action and secure your Diablo 4 gold!

Goblins are fast, elusive enemies known for traveling in groups and fleeing at the first sign of danger. If they escape, they take their precious loot with them, which can range from gold to rare and unique items. The key to stopping these sneaky creatures lies in AoE abilities—attacks that deal damage over a wide area, hitting multiple enemies at once.

AoE attacks are essential for taking down goblins before they scatter. By efficiently clearing out goblin packs, you save time and resources, allowing you to secure better loot faster.

When goblins start to flee, single-target attacks often won’t cut it. AoE abilities let you hit multiple goblins at once, ensuring that you don’t waste time chasing them down. With AoE, you can obliterate entire packs of goblins in seconds, allowing for faster progression through dungeons and, ultimately, more loot.

To maximize your goblin farming efforts in Season 5, it’s important to choose a class that excels at AoE damage. Here’s a breakdown of some of the best classes for the job:

Sorceress: Sorceresses are unmatched when it comes to AoE damage. Spells like Meteor and Blizzard can decimate groups of goblins in seconds. Combine these with freezing effects to prevent goblins from fleeing.

Barbarian: The Barbarian’s Whirlwind is a classic AoE ability that continuously deals damage as you move through groups of goblins. Abilities like Ground Stomp can stun enemies, setting them up for a follow-up with Whirlwind.

Druid: With nature-based spells like Hurricane and Tornado, Druids can control large areas of the battlefield, making them ideal for trapping goblins in deadly AoE zones.

Rogue: While primarily a single-target class, Rogues excel at AoE from a distance with abilities like Rain of Arrows. Their agility allows them to quickly reposition and deal devastating AoE damage without getting surrounded.

With the right AoE skills in hand, it’s time to focus on strategies that will help you hunt goblins effectively. Here are some tips to streamline your goblin-farming efforts:

1.Optimal Positioning

    Goblins are quick and often move in groups, typically found in areas with plenty of escape routes. To trap them, position yourself in tight spaces, like corridors or choke points, where your AoE attacks can hit multiple goblins at once. This will prevent them from scattering and escaping with your loot.

    2.Skill Synergy

      Combining AoE attacks with crowd control abilities is the key to maximizing your damage output. For example, a Barbarian can use Ground Stomp to stun a pack of goblins, then follow up with Whirlwind to finish them off. This synergy between abilities ensures that goblins are incapacitated long enough for you to take them down.

      3.Team Coordination

        If you’re playing in a group, coordination is essential. Sync your AoE attacks to hit goblin packs at the same time, ensuring that they are overwhelmed and taken out before they can flee. A well-organized team can quickly clear entire areas of goblins, maximizing the loot drop for everyone.

        4.Prioritize Loot Collection

          Once the goblins are defeated, make sure to gather all the loot before moving on. Goblins are known for dropping rare and valuable items, so it’s important to sweep the area thoroughly to avoid missing any high-quality rewards.

          Season 5 of Diablo IV introduces exciting challenges, and goblin farming with AoE abilities is one of the best ways to secure rare loot. By choosing the right class, mastering AoE skills, and employing strategic positioning, you can efficiently take down goblin packs and collect their valuable treasures. Whether you’re playing solo or in a coordinated team, these tactics will give you the edge you need to dominate goblin encounters.

          For an extra boost in your adventures, you can always buy Diablo 4 Items to fast-track your progression and enhance your gear. Now that you’re armed with these strategies, dive into Season 5 and reap the rewards of mastering AoE abilities!