Author: Justin Johnston

Best Way to Earn Permanent Double Points in Ashes of the Damned – Black Ops 7 Zombies

Call of Duty Black Ops 7 Zombies continues the franchise’s tradition of hidden Easter eggs, and few are as impactful as the Permanent Double Points reward in Ashes of the Damned. This secret unlock transforms melee kills into a powerhouse of Essence, making early-game upgrades, Perks, and Pack-a-Punch progression much faster.

In this guide, we’ll cover everything you need to know about unlocking Permanent Double Points, step by step, and provide tips for maximizing its potential in both standard and Cursed Mode matches.

What Are Permanent Double Points in Ashes of the Damned?

Permanent Double Points is a hidden Easter egg that doubles the Essence earned from melee kills for the entirety of a match. Unlike standard Double Points power-ups, this bonus:

·Does not expire

·Does not require activation

·Applies exclusively to melee kills

Once activated, players can leverage this bonus to:

·Max out Perks quickly

·Upgrade weapon rarity early

·Fully Pack-a-Punch multiple weapons

·Maintain full armor and field upgrades effortlessly

Even in Cursed Mode, where resources are scarce, Permanent Double Points can dramatically accelerate progression and give you a massive economic advantage.

Step-by-Step Guide to Unlock Permanent Double Points

Players who want to practice the mechanics safely or learn the route without pressure often test strategies in controlled environments like Call of Duty Black Ops 7 Bot Lobbies, where movement, positioning, and melee timing can be refined before attempting the Easter egg in a live match.

Step 1: Acquire Death Perception

Death Perception is a Perk-a-Cola that allows you to see hidden interactables through walls critical tool for this Easter egg.

·Location: Barn at Vandorn Farm

·Cost: Standard Perk price

With Death Perception, you’ll be able to locate the glowing pawprints that trigger the melee Zursa encounter.

Step 2: Enter the Fog Roads

The next step involves venturing into one of the fog-covered roads connected to Ashwood:

·Crashed Rocket Road: Ashwood → Zarya Cosmodrome

·Orda Graveyard Road: Ashwood → Exit 115

A glowing bear pawprint will appear along one of these paths. Use Death Perception to spot it and interact.

Step 3: Follow the Bear Pawprints

Interact with the initial pawprint to activate a trail leading deeper into the fog:

·Follow the sequence carefully

·Missing a pawprint halts progression

Upon reaching the final pawprint, a cutscene triggers, transporting you to the melee Zursa miniboss arena.

Step 4: Prepare Inside the Boss Arena

When you arrive, your HUD may appear empty. This is a visual glitch. Immediately:

·Pick up all dropped weapons and equipment

·Ensure all Perks and Armor are restored

Failure to retrieve your gear will make the fight significantly harder.

Step 5: Defeat the Zursa Bear Using Melee Only

This is the crucial step. To succeed:

·Use only knife or melee weapon attacks

·Avoid shooting, explosives, or other damage sources

·Armor and Perks can be used for defense, but damage must be melee-only

Once defeated, the Zursa bear explodes, dropping a black orb into a nearby chest.

Step 6: Claim the Claw Talisman

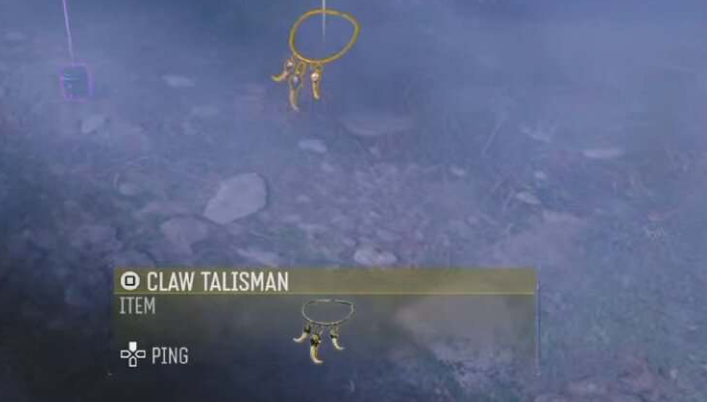
Interact with the chest to acquire the Claw Talisman, which grants:

·Permanent Double Points for melee kills

·A bonus that lasts for the entire match

·No cooldown or activation needed

From this point forward, every melee elimination generates massive amounts of Essence, allowing you to snowball upgrades efficiently.

Best Strategies for Using Permanent Double Points

To maximize your earnings:

1. Early Round Melee Focus: Clear low rounds with melee weapons to generate exponential Essence.

2. Melee-Boosting Perks: Combine with perks that increase melee damage for faster kills.

3. Early Pack-a-Punch: Use the extra points to unlock Pack-a-Punch and higher weapon rarities quickly.

4. Cursed Mode Advantage: Offset difficulty spikes by maintaining consistent resource generation.

Why Permanent Double Points Is a Game-Changer

Permanent Double Points is one of the strongest hidden rewards in Ashes of the Damned, giving players near-infinite Essence potential for the remainder of the match. The benefits include:

·Accelerated progression through the Pack-a-Punch system

·Rapid Perk maxing for survivability

·Increased weapon rarity upgrades early, making mid- and late-game rounds much easier

·Total control over in-match economy for both standard and Cursed Modes

Completing this Easter egg also showcases mastery over Ashes of the Damned and is a must-do objective for players aiming for competitive efficiency.

Final Thoughts

Unlocking Permanent Double Points in Ashes of the Damned gives Black Ops 7 Zombies players an unparalleled edge. While the melee-only Zursa fight requires skill and precision, the reward-continuous double Essence from every melee kill is unmatched.

Whether you’re farming early rounds, rushing Pack-a-Punch, or tackling Cursed Mode challenges, the Claw Talisman is an essential tool. Practicing the steps in Bot Lobbies or choosing to buy CoD Black Ops 7 Bot Lobbies can save time, reduce frustration, and ensure you complete this powerful Easter egg.

Path of Exile 2: The Ultimate Summoner’s Companion Guide

In Path of Exile 2, few monsters have captured the attention of the community quite like Frozen Mandibles – a beast-type monster known for its devastating strength, relentless speed, and unmatched synergy with summoner builds. Whether you’re taming it as a companion or binding it as a spectre, this creature stands as one of the most efficient and versatile allies available in the game.

For those experimenting with summoner archetypes or hunting for elite Path of Exile 2 Items, learning how to find and farm the Frozen Mandibles efficiently is a must. This guide breaks down everything you need to know – from its exact spawn location and farming method to why it’s considered one of the best beasts in Path of Exile 2.

Why Frozen Mandibles Is One of the Best Beasts in Path of Exile 2

Frozen Mandibles is not your average rare monster – it’s an elite-tier enemy designed to test players’ skill and reward those who approach it strategically. Its power and mobility make it a top choice for summoner builds, offering several distinct advantages:

·High Combat Strength: Frozen Mandibles hits hard and can tank plenty of damage, making it a perfect frontline companion.

·Exceptional Movement Speed: Unlike most minions or beasts, it moves fast enough to keep up with your character, even when sprinting through zones.

·Aura Synergy: Capable of spawning with aura modifiers such as Haste Aura, Frozen Mandibles can provide both offensive and defensive support.

·Summoner Versatility: Works flawlessly with both Tame Beast (for recruiting) and Bind Spectre (for revival), making it a flexible choice for endgame setups.

If you’re running a summoner-focused character, few companions can match Frozen Mandibles in both utility and power scaling potential.

Where to Find Frozen Mandibles in Path of Exile 2

You can find Frozen Mandibles exclusively in the Ashen Forest, a dense, haunting biome accessible after completing Act 4.

Step-by-Step Directions:

1. Progress through the campaign until you finish Act 4.

2. Select the travel option to Mount Kriar.

3. Head north to enter the Ashen Forest zone.

4. Explore the area while activating checkpoints along the way – Frozen Mandibles consistently spawn near the fifth checkpoint.

Frozen Mandibles Checkpoint Locations:

·First Checkpoint: Near the Glade entrance.

·Second Checkpoint: By the exit leading to Kriar Village.

·Third Checkpoint: Close to the Ancient Monument point of interest.

·Fourth Checkpoint: Near a large spider pit, often surrounded by web clusters.

·Fifth Checkpoint: This is your goal – a Frozen Mandible always spawns in this area.

Each Ashen Forest map is procedurally generated, but the fifth checkpoint consistently houses the Frozen Mandibles spawn. Keep your eye out for a large, ice-covered creature with blue aura effects.

How to Farm Frozen Mandibles Efficiently

Farming the right Frozen Mandibles – especially one with a Haste Aura or other powerful modifiers – can take time. Thankfully, Path of Exile 2’s checkpoint system makes rerolling spawns simple and efficient.

Efficient Farming Method:

1. Locate the Frozen Mandibles spawn near the fifth checkpoint.

2. Don’t kill it immediately – first, inspect its modifiers.

3. If the modifiers aren’t ideal, activate the checkpoint.

4. Pause the game and select “Respawn at Checkpoint.”

5. This resets the instance, forcing the Frozen Mandibles to respawn with new modifiers.

6. Repeat until you find your desired version (e.g., one with Haste Aura or increased life).

Important Notes:

·If you kill the Frozen Mandibles, it won’t respawn on checkpoint reset – you’ll need a new Ashen Forest instance.

·It always spawns with another rare monster nearby. Eliminate the secondary rare to streamline your farming.

Using this method, you can reliably farm for the perfect beast without relying on RNG-heavy map rotations.

Why Frozen Mandibles Is Ideal for Tame Beast and Bind Spectre

Frozen Mandibles’ true value shines when paired with Tame Beast or Bind Spectre, two of the most powerful summoner mechanics in Path of Exile 2.

For Tame Beast Users:

·Frozen Mandibles make for a durable, high-damage companion.

·If it spawns with Haste Aura, it passively boosts your entire team’s mobility.

·Its exceptional speed ensures it never lags in fast-paced maps.

For Bind Spectre Users:

·Reviving a Frozen Mandibles allows it to retain its powerful abilities.

·It scales exceptionally well into late-game encounters due to its balanced damage and survivability.

·Works perfectly in synergy with other spectres, acting as both a tank and aura-support hybrid.

The ability to function as both a melee powerhouse and a support aura unit makes Frozen Mandibles one of the most efficient and sought-after beasts in the entire game.

Farming Tips and Build Synergy

To maximise your farming runs and efficiency:

·Use Speed Builds: Equip gear or skills that increase movement speed to reach the fifth checkpoint faster.

·Bring Cold Resistance: Frozen Mandibles attacks often inflict chill or freeze – stack resistance to avoid getting slowed down.

·Use Capture Mods: If you plan to tame the beast, ensure your gear supports capture bonuses for better odds.

·Pair With Summoner Gear: Items that boost Minion Speed or Aura Effect greatly enhance Frozen Mandibles’ performance once recruited.

Players who want to optimise even further can buy POE 2 Items or stock up on Path of Exile 2 Currency to upgrade their summoner gear and reroll modifiers faster.

Final Thoughts

Frozen Mandibles isn’t just a powerful beast – it’s a statement of summoner mastery in Path of Exile 2. Its mix of high mobility, durability, and aura potential makes it an essential companion for any Tame Beast or Bind Spectre user.

With a guaranteed spawn in Ashen Forest and a straightforward checkpoint farming method, this elite monster is well worth the grind. Whether you’re farming for a Haste Aura variant or building a top-tier summoner army, securing the right Frozen Mandibles can dramatically elevate your gameplay experience.

Best New World Starmetal Locations – New World Guide

In New World, gathering resources is a core part of the gameplay, and one of the most coveted materials for crafting powerful weapons, tools, and armor is Starmetal. This rare and valuable resource allows players to craft high-tier equipment and is a key ingredient in many of the game’s more advanced recipes. Whether you’re looking to upgrade your gear, create powerful weapons, or just maximize your crafting potential, knowing where to find Starmetal can give you a significant advantage.

In this guide, we will explore the best Starmetal locations in New World, providing tips and strategies for collecting this valuable resource efficiently. This will help you obtain more resources such as New World Gold in the game.

What is Starmetal?

Starmetal is a rare resource in New World used for crafting higher-tier equipment such as Starmetal Ingots, weapons, and armor. To mine Starmetal, players need to use a pickaxe and have a minimum gathering skill level of 100. This means you’ll have to level up your gathering proficiency, which requires patience and persistence.

While it’s not as rare as Orichalcum or other late-game materials, Starmetal is a key resource for progressing your crafting and gaining an edge over your competitors. Finding abundant Starmetal nodes is crucial for staying ahead in the game, particularly if you’re crafting items for yourself or selling high-tier goods on the market.

Top Starmetal Locations in New World

There are several places across New World where Starmetal can be found, but knowing where the most concentrated and easily accessible nodes are will save you time and effort. The best locations for mining Starmetal are typically found in regions with higher-level enemies and a greater concentration of ore deposits.

Here are the best Starmetal locations you should focus on:

1. Ebonscale Reach

Ebonscale Reach is one of the prime locations for Starmetal in New World. This region, located on the eastern side of the map, is known for its high-level resources and dangerous mobs. It’s one of the more challenging zones, so you should be prepared for a fight while mining.

Key Starmetal Mining Areas: The area surrounding the Chamber of the Exiled and The Greenhollow is littered with Starmetal veins. You’ll also find veins along the cliffs near the Ebonscale Reach Expedition. These veins are scattered across the landscape, and there are many places to find them without venturing too far into enemy territory.

Tips: Bring a friend or a high-level gear set if you’re not fully geared, as the region has tough elite enemies. Also, make sure to look for hidden Starmetal veins on cliffsides and around the edge of the region.

2. Shattered Mountain

Shattered Mountain is another high-level zone, located in the northernmost part of Aeternum. This region offers some of the highest concentrations of Starmetal veins in the game, making it an excellent place for gathering.

Key Starmetal Mining Areas: Look for veins around The Forge and the Vanguard Outpost areas, where Starmetal can often be found in large clusters. The central part of the mountain also has many mining nodes.

Tips: Shattered Mountain is full of hostile elite mobs and high-level enemies, so take caution when gathering resources here. However, if you’re willing to brave the dangers, it’s a great spot for both Starmetal and other high-tier materials like Orichalcum.

3. Great Cleave

Great Cleave is a mid-level area, and although it’s not as challenging as Ebonscale Reach or Shattered Mountain, it offers an abundance of Starmetal veins. This makes it an excellent place to gather Starmetal if you’re looking for a less dangerous but still rewarding location.

Key Starmetal Mining Areas: The area near the Clefted Reach and Soulmire zones has a good concentration of Starmetal nodes. You’ll find these veins spread throughout the mountain regions of the map, making this location both safe and efficient for farming Starmetal.

Tips: The Great Cleave is relatively safe compared to other higher-level zones, but you should still be cautious of roaming enemies. Consider looking for veins near the edges of the map or close to the cliffs where other mining nodes may be hiding.

4. Windsward

Windsward is one of the first major areas in New World and is often a hot spot for new players. Despite being a low-to-mid-level zone, it still contains a solid number of Starmetal veins. If you’re a newer player or just looking for some quicker, lower-risk farming, Windsward can be a great place to start.

Key Starmetal Mining Areas: The hills and mountains around Everfall are full of Starmetal veins. You’ll find a dense concentration of mining nodes just north of the Windsward Outpost and scattered along the northern cliffs of the region.

Tips: While the competition for resources in Windsward can be high due to its popularity, it is one of the safest zones for low-level players looking to farm Starmetal. If you’re new to the game, you might also find it easier to level up your mining skill here.

5. Reekwater

Reekwater is a mid-to-high-level area known for its dense fog, treacherous terrain, and high-tier resources. This zone features a large number of Starmetal veins, especially around the Rendwater Ridge and Mourningdale areas.

Key Starmetal Mining Areas: Focus on areas near the Swamps of Ternion, the Ridge of Calamity, and the Mourningdale Outpost. These locations feature numerous Starmetal veins that will provide you with the material you need for crafting.

Tips: Reekwater is home to several elite mobs, so it’s essential to bring a friend or a powerful weapon if you plan on mining for Starmetal here. The region’s dense fog can also make navigation difficult, so ensure you have a map or waypoints set up before venturing into dangerous areas.

6. Monarch’s Bluffs

Monarch’s Bluffs is one of the earliest zones you’ll encounter in New World, but it remains a strong contender for finding Starmetal even in the late game. This zone is ideal for players who want to farm Starmetal with minimal risk, as it’s a lower-level area with fewer elite enemies.

Key Starmetal Mining Areas: The areas around Windsward Plateau and Monarch’s Keep feature a large number of Starmetal veins. These locations are relatively safe to farm, and you can expect a steady supply of Starmetal to gather.

Tips: If you’re a lower-level player or simply looking for a more relaxed farming experience, Monarch’s Bluffs is a great place to start. Keep an eye out for other resources like Iron Ore and Silver Ore in the same areas.

Tips for Efficient Starmetal Farming

Upgrade Your Gathering Tools: As your gathering skill increases, make sure to upgrade your pickaxe to improve your mining efficiency. A higher-tier pickaxe will allow you to mine faster and gather resources more effectively.

Farm During Off-Peak Hours: Some of the best Starmetal locations can get crowded with other players, especially during peak hours. Consider farming during off-peak times to avoid competition and ensure you can gather as many resources as possible.

Use Tiers for Efficient Routes: Create specific routes through the most concentrated areas of Starmetal deposits. This allows you to mine in circles, maximizing your time spent gathering without backtracking.

Check for Resource Respawns: Resources like Starmetal respawn over time, so be sure to revisit the same locations periodically. This will ensure a constant supply of the material as you progress through the game.

Conclusion

Starmetal is a crucial resource for crafting high-tier weapons, armor, and tools in New World. Whether you’re a seasoned player or just starting out, knowing the best locations to mine Starmetal will make your gathering efforts more efficient and rewarding. The regions of Ebonscale Reach, Shattered Mountain, Great Cleave, and others offer abundant veins of Starmetal, each with their unique challenges and rewards. To quickly acquire more resources, you can purchase cheap New World Coins.

By focusing on these areas, optimizing your mining routes, and being prepared for the dangers of higher-level zones, you’ll be well on your way to collecting Starmetal and progressing in New World. Happy mining!

Path of Exile 2:Woolie Ultimate Riven Poison Build Explained

In Path of Exile 2, few builds strike the perfect balance between precision, speed, and lethal efficiency like the Woolie Riven Poison Build. Designed around maximizing poison damage through High Velocity Rounds and Riven Armor, this setup turns accuracy and timing into unstoppable firepower. With Garukhan Resolve amplifying your critical strikes and Heralds of Blood and Plague handling clear speed, this build dominates both bosses and maps with surgical precision.

This build power revolves around High Velocity Rounds-each hit benefits from Riven Armor storing 5% of dealt damage. To make that count, you’ll need pinpoint accuracy and consistent criticals.

1.Accuracy First-Stack as much Accuracy Rating as possible. It’s the key to steady damage output, boosted even further by the Penetrate passive, which scales both your minimum and maximum hits.

2.Garukhan Resolve-The true damage multiplier. It enhances critical hit efficiency and turns every High Velocity Round into a burst of poison chaos.

3.Crafting Efficiency-Instead of grinding endlessly, many players use POE 2 Currency to grab Garukhan Resolve early and roll perfect modifiers faster.

Single-Target Rotation:Maximum Burst Damage

Boss fights are where this build shines. Stay close to your target-High Velocity Rounds deal more damage at short range.

Ideal Rotation:

1.Setup:Cast Despair before the fight begins. Use Spearfield (if you have Escalating Mayhem) to build early poison stacks.

2.War Banner:Drop it for a global damage buff.

3.Armor-Piercing Rounds:Fire until the target’s armor is broken.

4.Apply Riven Armor:Use High Velocity Rounds and keep moving to activate Spray and Pray.

5.Poison Build-Up:Spam Spearfield to layer poison via Splinter of Loratta.

6.Repeat:Once Riven Armor falls off, go back to Step 2.

Map Clearing Strategy

For general clearing, swap into AoE mode for effortless flow:

Spam Siege Cascade to annihilate large groups.

Herald of Blood+Herald of Plague handle cleanup automatically, spreading poison to survivors.

This combo delivers one of the smoothest, fastest clear speeds available in Path of Exile 2.

Build Variants

Mid-Budget Setup:

Rare crossbow with Accuracy, Crit Chance, and Crit Damage.

Garukhan Resolve (core unique).

Darkness Enthroned (Gloves) + Courtesan Mannan Rune of Cruelty.

Prism of Belief (+2 to High Velocity Rounds minimum).

Controlled Metamorphosis on a medium ring.

Endgame Variant:

Crossbow with max Accuracy, Crit Chance, and +level to projectile skills.

Corrupted Splinter of Loratta with+Attack Speed and 2 sockets (Soul Core of Quipolatl).

Instilled Lasting Trauma on your amulet.

Full divine-tier setup using Atalui Bloodletting and Ratha Assault for massive scaling.

Equipment & Jewel Priorities

Gear Order:

1.Main Hand:Splinter of Loratta (Weapon Set 1-works with Rigwald Ferocity).

2.Body Armor:Vile Robe.

3.Helmet:Desert Cap.

4.Gloves:Refined Bracers.

5.Boots:Cavalry Boots.

6.Amulet:Solar Amulet with Lasting Trauma.

7.Belt:Darkness Enthroned (Gloves variant).

8.Rings:Ruby Ring+Gold Ring.

Jewel Focus:

Prism of Belief (+2 to High Velocity Rounds).

Controlled Metamorphosis (Medium Ring slot).

Stat Priority:

Accuracy Rating:Guarantees consistent damage.

Crit Chance & Crit Damage:Core synergy with Garukhan Resolve.

+Skill Levels:Boosts projectile output.

Intelligence (137):Required for Level 18 Despair.

Skill Gem Optimization

Keep Spearfield at Level 5 for tighter overlap and better mana efficiency.

Despair should be Level 18 to maximize curse coverage.

Power Shots can go on an amulet or Megalomaniac for bonus DPS.

With Atalui Bloodletting, you’ll skyrocket your poison burst, while Ratha Assault upgrades Siege Cascade for elite clearing flexibility.

The Woolie Riven Poison Build stands among the most satisfying ranged setups in Path of Exile 2. It rewards precision and timing while unleashing terrifying poison bursts that melt bosses in seconds. By investing in accuracy, synchronizing Riven Armor with Garukhan Resolve, and using the right crafting materials-or even a bit of buy Path of Exile 2 Currency-you’ll carve through maps and endgame encounters with ruthless efficiency.

Diablo 4 Season 10 Spiritborn Build: Mastering Evade Mechanics

The Spiritborn remains one of the most versatile and exciting classes in Diablo 4, and in Season 10: Infernal Chaos, the Evade Spiritborn takes center stage as one of the strongest endgame builds available. Five seasons after its debut, the class has received buffs, reworks, and new layers of customization, all of which make the Evade-focused playstyle more powerful than ever.

This guide breaks down why the Evade Spiritborn is dominating Season 10, the gear you’ll need to unlock its potential, the skills that define its gameplay loop, and the pros and cons of committing to this demanding but incredibly rewarding build.

Why the Evade Spiritborn Dominates in Season 10

The Spiritborn class excels at balancing offense and defense while weaving mobility into its kit. The Evade archetype has always been popular because it allows players to deal damage while dodging attacks. This dual-purpose approach makes the build ideal for both hardcore survivalists and aggressive endgame grinders.

In Season 10, the reworked Eagle Primary Spirit Hall ensures that every cast of Evade or an Eagle skill releases feather projectiles, creating a near-constant stream of damage. Combined with Thunderspike’s cooldown reduction, the Evade Spiritborn has evolved into an S-Tier build for clearing hordes of enemies in Nightmare Dungeons, surviving Infernal Hordes, and tackling bosses with consistent DPS output.

The real beauty of the build is its uptime. By cycling skills strategically and leveraging cooldown resets, Evade becomes not only a mobility option but also a constant source of projectile damage, making it one of the most efficient builds in Diablo 4’s Season of Infernal Chaos.

Core Skills for the Evade Spiritborn

The Evade Spiritborn uses a streamlined skill set that maximizes damage, control, and survivability. Here are the core abilities you’ll rely on:

·Thunderspike – The lynchpin of the build. Reduces Evade’s cooldown and triggers the Eagle Spirit Hall projectile effect.

·Vortex – Provides powerful AoE damage while grouping enemies for projectile barrages.

·The Seeker – A reliable Eagle Skill that supplements your damage and keeps projectiles flowing.

·Counterattack – A defensive option that punishes enemies who connect with attacks.

·Armored Hide – Your main damage reduction tool, critical for surviving high-tier endgame content.

The rotation prioritizes keeping Evade active, weaving in Thunderspike to accelerate cooldown recovery, and using Vortex to keep enemies grouped for maximum feather projectile effectiveness.

Gear Requirements: Chaos Uniques

Unlike some builds that can thrive with flexible gear choices, the Evade Spiritborn is highly item-dependent. At minimum, it requires five Chaos Uniques, each of which synergizes perfectly with the build’s playstyle:

1. Sepazontec – Enhances Thunderspike, scaling your primary damage tool into the late game.

2. Wushe Nak Pa – Boosts the projectile damage granted by the Eagle Spirit Hall.

3. Loyalty’s Mantle – Increases Spirit Hall potency if Eagle is chosen for both Primary and Secondary, multiplying your overall DPS.

4. Jacinth Shell – A high-risk Unique that reduces cooldowns dramatically but constantly drains health. Mastering it requires careful play and strong healing.

5. Band of First Breath – Enhances both offense and defense by triggering Armored Hide when Evade is cast.

Why Chaos Versions Matter

Season 10’s Chaos Armor mechanic makes these Uniques even stronger. Chaos versions drop with maximum affix rolls and a 20% boost to their Unique Affixes, eliminating RNG frustration and giving the Evade Spiritborn reliable scaling.

Myths to Elevate the Build

While the Chaos Uniques are essential, the Evade Spiritborn truly becomes an endgame monster when paired with powerful Mythic items. For players willing to farm Infernal Hordes and Chaos Rifts-or even use Diablo IV Items to speed up the grind- Mythics are game-changing:

·Shroud of False Death – Boosts all passives by +1 while enhancing movement speed and damage. Perfect synergy with the Spiritborn’s mobile playstyle.

·Harlequin Crest – The returning fan-favorite, granting a universal 20% cooldown reduction. This keeps Evade active almost permanently and ensures you can weave skills seamlessly.

Acquiring both Mythics along with the required Chaos Uniques takes patience, but the result is a build that feels unstoppable across all forms of content.

Gameplay Loop and Rotation

The Evade Spiritborn’s playstyle is built on fluidity. Here’s how you’ll approach combat:

1. Open with Vortex to group enemies tightly.

2. Cast Thunderspike repeatedly to reduce Evade’s cooldown.

3. Use Evade offensively and defensively-triggering feather projectiles while dodging hits.

4. Activate The Seeker for additional damage during downtime.

5. Maintain Counterattack and Armored Hide for defensive stability.

At peak efficiency, you’ll weave Thunderspike and Evade together so smoothly that your character rarely stops moving or firing projectiles. Bosses fall to consistent pressure, while large enemy packs are shredded by waves of feathers.

Pros and Cons of the Evade Spiritborn

Every build comes with trade-offs, and the Evade Spiritborn is no exception. Here’s a breakdown:

Pros

·S-Tier Damage Output – Near-constant projectiles and boosted Thunderspike bursts melt enemies.

·Extreme Mobility – Evade doubles as damage and repositioning, making the build feel incredibly agile.

·Solid Survivability – Armored Hide, Counterattack, and defensive Chaos Uniques provide strong layers of protection.

Cons

·Gear Dependent – Requires five Chaos Uniques and ideally two Mythics to reach full potential.

·High Risk – Items like Jacinth Shell demand precise health management.

·Farm-Heavy – New players or casual grinders may struggle to assemble the required gear.

Farming and Progression Tips

Because this build is so gear-dependent, efficiency in farming is critical. Here are some quick tips to speed things up:

·Target Infernal Hordes for Chaos Uniques. Bartuc’s Horde has the highest drop chance.

·Run Chaos Rifts consistently for Mythic chances.

·Use trading hubs to buy Diablo IV Items if farming isn’t yielding results. This can save weeks of grind and let you enjoy the build faster.

·Prioritize Sepazontec first, as it unlocks the build’s full DPS loop.

Final Thoughts: Is the Evade Spiritborn Worth It?

The Evade Spiritborn is not the easiest build to put together in Diablo 4 Season 10. It requires multiple Chaos Uniques, at least one Mythic, and a serious time investment in farming. However, for players willing to chase the full setup, the payoff is enormous:

·Unmatched mobility and damage uptime.

·Consistent performance in both AoE and boss fights.

·A rewarding, skill-based playstyle that feels unique in the current meta.

For grinders, traders, or anyone willing to buy Diablo IV Items to shortcut the process, this is one of the most satisfying and powerful builds available in the Season of Infernal Chaos.

If you’re looking for a build that blends agility, survivability, and relentless DPS, the Evade Spiritborn is absolutely worth your time. Get your Chaos gear, chase those Mythics, and prepare to carve your way through Sanctuary with one of the best endgame setups Diablo 4 has ever offered.